
Stone is a popular material for outdoor light fixtures because it is durable and often decorative. However, installing an outdoor light fixture on stone can be tricky.
This improves the appearance of your home, patios, garage, and other structures. Installing an outdoor light fixture on stone can be done in a variety of ways. We’ll go over the many options for installing an outdoor light fixture on a stone wall. Please stay tuned.
What You’ll Need to Install Outdoor Light Fixtures on Stone
Installing an outdoor light fixture on a stone surface can be a difficult task. There are some necessary tools required to complete this task, they are:
- LED light
- Screw
- Screw cutter
- Silicon
- Screwdriver
- Gloves
- Wires
- Electrical tape
- Sensor
- Wingnuts
- Safety glasses
Installing Outdoor Light Fixtures on Stone: A Step-by-Step Guide
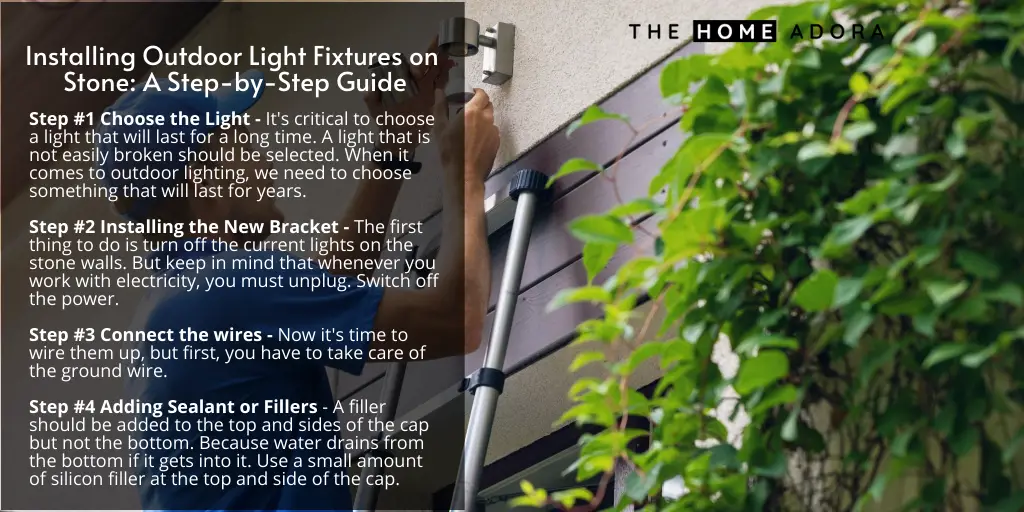
Step #1 – Choose the Light
It’s critical to choose a light that will last for a long time. A light that is not easily broken should be selected. When it comes to outdoor lighting, we need to choose something that will last for years.
When purchasing lighting, the wattage must be considered (the number of watts in lamps) so that the light can be used for a longer time (Available on Amazon). The highest wattage bulb, for example, will survive longer than the lowest wattage light.
Step #2 – Installing the New Bracket
The first thing to do is turn off the current lights on the stone walls. But keep in mind that whenever you work with electricity, you must unplug. Switch off the power. These carriage lights are held together by two little screws on the sides. Just throw it out there. You may now secure the new bracket with two screws. If the screws are somewhat longer than the hole, you must cut them using a screw cutter. Now put these screws into the bracket. Then, using a plier, tighten the screw.
Step #3 – Connect the wires
Wires are classified into three types: white, black, and ground wire. Now it’s time to wire them up, but first, you have to take care of the ground wire. The wire nuts are then used to secure the wires. Please make certain that they are tightened. You will have to cover these wing nuts with electrical tape once they’re on. while the electrical tape was being applied to the insulation.
The wingnuts are wrapped with electrical tape to keep moisture out. Because there is so much water and dampness outside, this is an outdoor light. As there is a possibility that water or moisture will enter it.
You can now put it in place. But first, you need to check the light. If the light is operational, you may proceed to place it in the mount. Then we can screw on the caps and make sure they’re securely fastened.
Step #4 – Adding Sealant or Fillers
A filler should be added to the top and sides of the cap, but not the bottom. because water drains from the bottom if it gets into it. Use a small amount of silicon filler at the top and sides of the cap.
You don’t need to leave a large bead of silicone on the top and sides since it looks good if you apply a small amount. There is no need to leave silicon on the bottom because water drains from the bottom.
Step #5 – Install the Sensor
The final thing you need to do is install a sensor. The sensor is placed on top of the light setup. You should put the sensor there because it detects darkness. When night falls, it automatically turns on. There is no need for a plug if you utilize a sensor.
Here is a Video to Help you Out
See more: Can You Use LED Light Strips Outside? : Your Guide To Getting It Done.
Frequently Asked Questions
Conclusion
Installing an outdoor light fixture on stone can be a little tricky. However, if the lights are correctly installed, you can reduce the problems. Installing the lights on the stones appears difficult, but it is not impossible. If you continue to have issues, you can seek expert assistance.
But with this step-by-step guide, you can do it yourself in no time. Be sure to comment and share your own tips for installing outdoor light fixtures on stone.
